


Parts
No parts specified.
-
-
NOTE: Special step for Hope hubs!! - If you are installing a pinch-bolt cassette on a Hope XD™ driver, you will need to use the stainless shims provided with your cassette in the box. Please go to step 2 of this guide.
-
Lightly grease the driver splines and install the aluminum portion of the cassette on the XD™ driver.
-
The alloy carrier is designed to fit tightly. This may require some added force in order to seat it fully.
-
Ensure that the aluminum portion of the cassette is fully seated and is bottoming on the stop surface at the base of the driver splines.
-
Tighten the 3mm pinch bolt to 3nm torque with a torque wrench.
-
-
-
Hope XD™ drivers do not conform to the XD standard and require a shim for proper pinch-bolt cassette function.
-
There are 3 different thickness shims included. Attempt to install the thickest first as you want to ensure the hit is tight as possible.
-
Note the recessed location on the freehub where the cassette clamps the body. This is where the shim will go.
-
Grease the splines and slide on the alloy piece as shown in step 1.
-
With the 3mm hex bolt fully loose, slide the shim over the driver body and insert one shim edge in between the alloy cassette and the driver body. Then slowly work around the body pushing the shim into place until it is fully seated.
-
Tighten the 3mm pinch bolt to 3nm torque with a torque wrench.
-
-
-
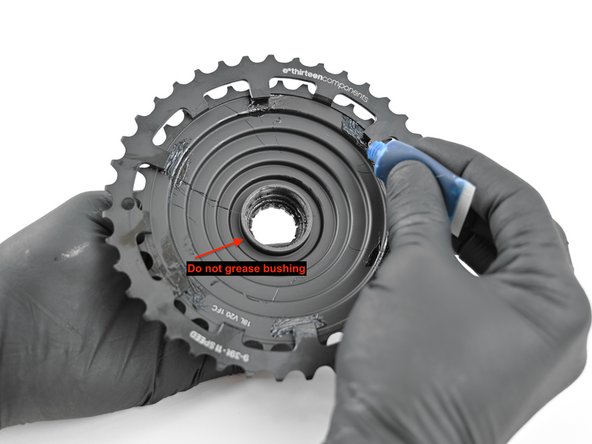
Make sure that the bushing is installed. This comes pressed into the steel section of the cassette.
-
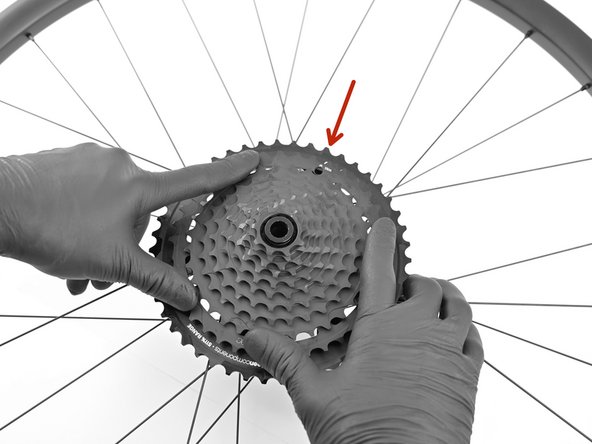
Align arrow on steel cluster with unlock symbol on alloy carrier. Apply firm, even pressure on the steel cluster so its fully seated on the XD driver and alloy cluster.
-
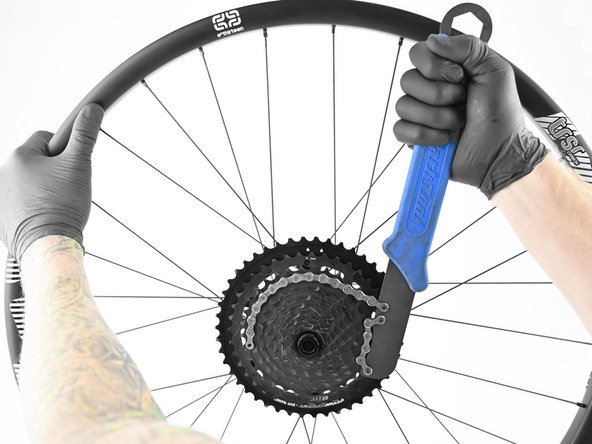
Using the chainwhip or HG lockring tool on of the steel cogs tighten clockwise to to the "locked" position.
-
This may take a decent amount of force to initially lock the two parts together.
-
-
-
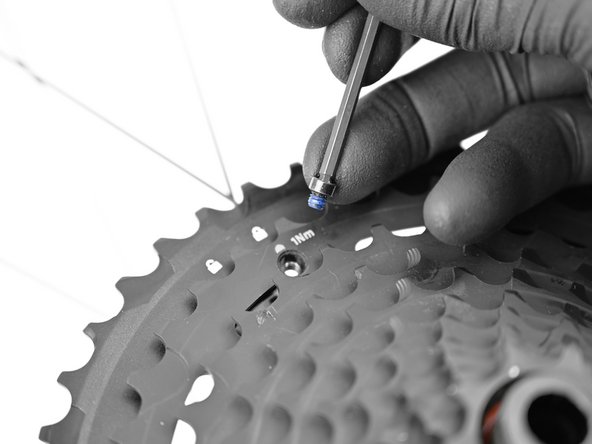
Using a 3mm hex key start to thread in set screw.
-
Torque 3mm hex set screw to 1Nm.
-
The set screw just needs to be flush with cassette cog. Lightly snugged is plenty! Over tightening this will result in stripped threads.
-
Lock screw allignment issues? First try additional locking force on the steel section. Next, ensure there are no burr's at the locking interface of the alloy section, reassemble, install without screw and test ride the bike putting load on the steel section. This should align the holes and you can insert the screw.
-
-
-
Using the 3mm hex key loosen the set screw and remove.
-
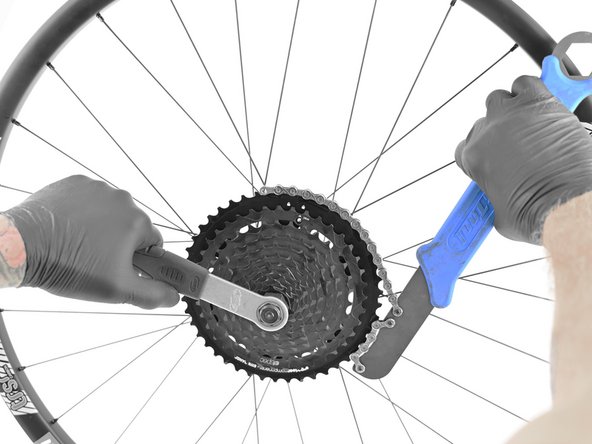
Place the chainwhip on the single largest alloy cog. Install cassette lockring tool into end of steel cluster.
-
While firmly holding the chainwhip turn the cassette lockring tool counter clockwise to unlock.
-
Ensure that one chain whip is on the large alloy portion of the cassette and the other chainwhip/cassette tool is on the steel section.
-
Remove the steel cluster from the XD driver.
-
This is designed to fit tight. If you are unable to remove by hand use a tire lever (something that will not damage the cassette) to help free the steel cluster.
-
-
-
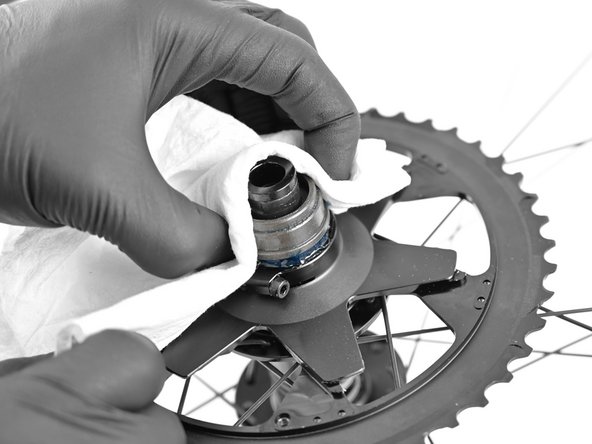
Use a paper towel to firmly grasp the bushing and remove.
-
Using the 3mm hex key loosen the pinch-bolt.
-
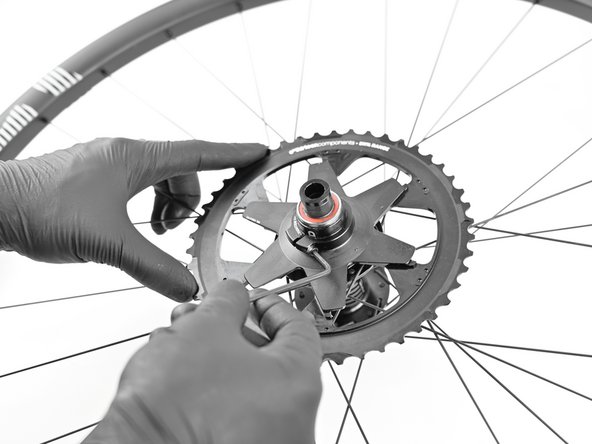
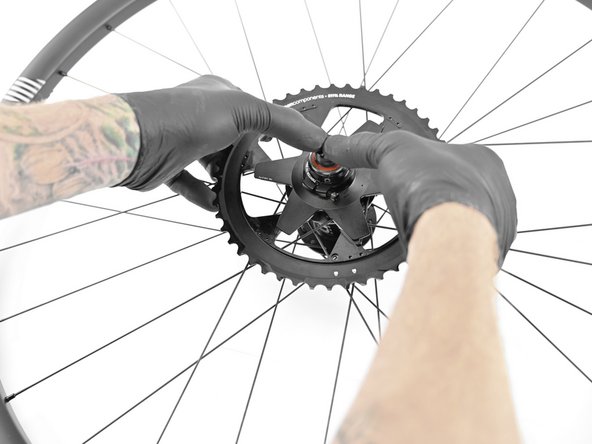
Pull on the alloy carrier to remove from XD freehub.
-


Thanks for reading, now get out there and ride!
Thanks for reading, now get out there and ride!